Tuesday, July 31, 2012

Fancy Toe Flats

Good evening! More like good morning, but whatever. Anyway, today I'm going to show you, my lovely readers, how to spruce up to your flats, the cheap and easy way. If the they're old and worn out or scuffed up, this is the perfect solution! So, without further ado...


What you'll need: 
  • Flats - any color, mine are cheapies from Walmart - they're not online, but you can get them in the store for just $5!
  • Sponge brush thing or paint brush.
  • White acrylic paint
  • Acrylic paint of your choice (mine is called Patina by Folk Art, looks like Tiffany green)
  • Painter's tape or packing tape
Step One:
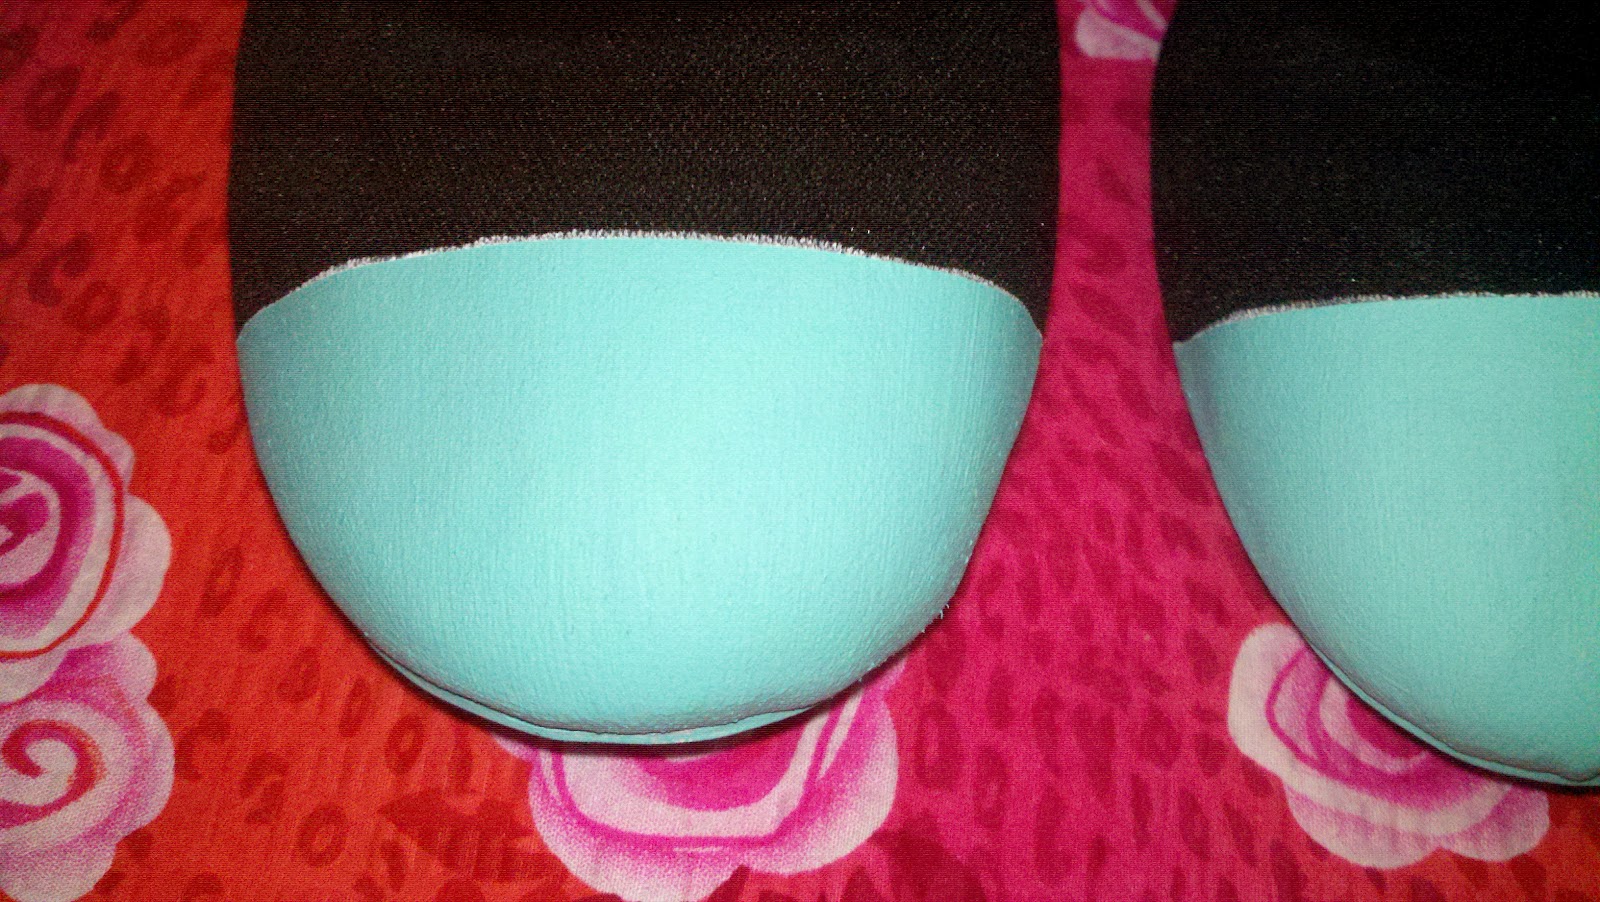
          Decide how much of the toe you want to be painted. Tape above the section you want painted, being careful to make sure that it is even on both shoes.
Step Two:
          Take the white paint and using long, even strokes, paint one thin coat on the toe. Make sure you get off all excess and try not to let streak. Let dry. Paint another coat of white and let dry.
Step Three:
          Once the white is dry, paint a thin coat of your color of choice using long even strokes. Let dry. For the final coat, use a thicker coat, almost like you're using too much paint, to make a thick covering. Let dry, this will take about an hour.
Step Four:
          Peel the tape off once dry and enjoy your new flats!
 Here's a picture of another pair I made:


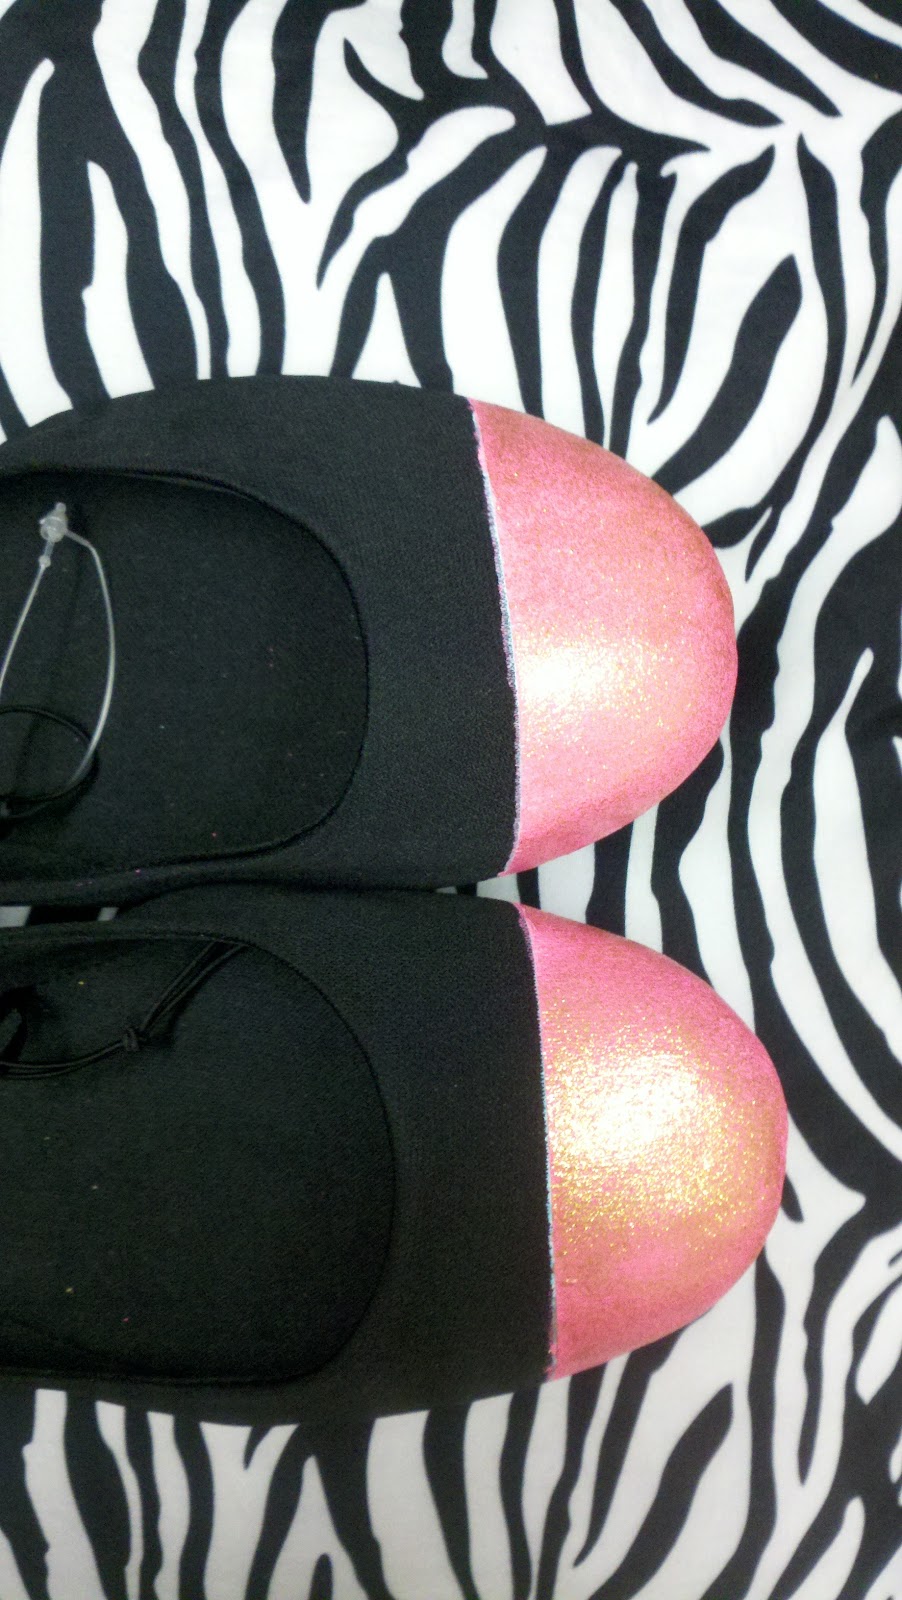
Despite having to wait for the paint to dry, it's a very simple and fast project and your shoes look so cute.


Sunday, July 29, 2012

Volcanic hair and scalp treatment

Hi! So in the summer, I have to use more junk in my hair to keep it from going berserk so I get gross product buildup. I call the the "volcanic" hair and scalp treatment because it reminds me of little kids science projects. This is an easy and cheap solution that will help clean your scalp :)

What you'll need:
  • Baking soda
  • Vinegar (any kind will do)
  • Water
  • Spoon and mixing bowl
 Step one:
           Sprinkle baking soda on dry hair, lifting sections to get it close to the scalp.

 (Stupid facial expression optional.)


(Found out that it's easier to use your hands)

Step Two:
          Take cap fulls of vinegar and pour it on your scalp. This makes it fizz and feel good :)

Step Three:
          Once your scalp is tingly and smelly (don't worry, your shampoo will take care of this), let it sit for about 15-20 minutes and wash out. Use conditioner and let it sit for a bit.

Step Four:
**Optional** I took it a step further and made a paste with the baking soda, a little water and then some vinegar.


Step Five:
          Put the paste on your head and walk around like you have a powdered wig on. Leave on for half an hour and wash out.


Taadaaa!

xoxo g
         

Thursday, July 26, 2012

New blog

Follow my new blog! Please! $ Store Couture

Wednesday, July 25, 2012

Diamond Headband

What girl, young and old, doesn't love something sparkly? I know I do, and I'm 22. These headbands are adorable and spruce up any outfit.

What you'll need:

  • Plain headband (plastic works better than metal. You can find them at the dollar store in a multipac.)
  • Embroidery floss 
  • Diamond chain (found this at Walmart for about $3)
  • Hot glue gun
  • Scissors
Step One:
          Using the floss, wrap the headband so it's all one color. (I don't have a picture. Sorry.)  Hot glue each end so it doesn't become unraveled.

Step Two:
         Take the diamond chain and glue one end to the side of the headband, about an inch and a quarter to an inch and a half above the bottom. Take the chain and line it up around the headband, gluing strategic points. Do this until you reach the other side and glue about an inch and half above the bottom. Cut off the excess diamonds. (Don't worry, they won't fall off.)


(Don't worry about the mess, you can scrape it off and it will be covered by the floss.)

Step Three:
           Take the floss and glue the end of the headband, on the inside. Start wrapping it around the inside of the diamonds, on the silver spaces. You should wrap each space two or three times so that you can't see the silver. I used a * star shaped wrap to make it fancy, but if you just use a regular wrap it will be fine.


Step Four:
          Hot glue the end of the floss to the inside of the headband once you reach the bottom of the diamonds and snip off the excess string.

Step Five:
         Straighten out the diamonds on the top and wear like you're a princess! I know I do ;)
       

xoxo g

Tuesday, July 24, 2012

Personalized Headphones/Earbuds

Bonjour! Tonight I'm going to show you how to personalize your headphones or ear buds. I'm not going to sugar coat this: it's probably the easiest one you can do, but it's very time consuming. This took me about 2 hours. Well, I was watching the Vampire Diaries at the same time so that might contribute to it. This is supposed to keep them from tangling. They will still get tangled, but not as bad.

What you'll need:

  • Pair of headphones or earbuds
  • Embroidery floss
  • Hot glue gun 
Step One:         Untangle your headphones. Pick your floss colors. You can have as many colors as you want. This is about personalizing and making them unique.

Step Two:
          Start your first color right below the thing that separates the cords for the ear buds and the cord that connects to your ipod. To start this color, put about a quarter to a half an inch of floss down the cord and start wrapping the floss right at the base of that plastic divider. I hope that the picture will clear things up.


Step Three:
          Continue wrapping for as long as you want. I made mine about 2-3 inches long for each color. I didn't cut the strings, because I wasn't sure how much would be needed, so I just used the skein and kept wrapping and cut it when I was done with that color. Before you cut, leave about an extra half inch at the end. I'll show you in the next step what you'll do with it.

Step Four:
          For your next color, you're going to take the half inch left from the previous color and lay it flat on the cord. Take the new color and lay the same amount against the cord. Start wrapping the new color at the base of the previous color.


Step Five: 
          Once you have wrapped all your colors, and have reached the bottom, take a hot glue gun and secure the end of the last string.

Step Six:
          To do the cords to the actual earbuds, use the same method. I wrapped all the way to the base of the earbuds and then secured with hot glue. I wrapped the plastic divider piece, too.


It's pretty easy, but time consuming. So sit down, watch your favorite show or movie and have fun! When you're done you'll have adorable and unique headphones that won't tangle as bad. :)

xoxo g

Monday, July 23, 2012

Braided back beach wear

Hi! Back again. Tonight I'm going to show you how to make another beach coverup that is along the same lines as this one. But it came out better. Promise.

What you'll need:


  • Big t-shirt (mine is a men's and two sizes bigger than what I usually wear in mens, but mine is white.)
  • Sharp scissors
  • Ruler
 (Yes, I do my projects at work. Shhh don't tell my boss!)

Step One:
           Cut the neck off your shirt. I measured two inches in from the seam at the collar on both sides. Fold shirt in half so the cut comes out even.


 Step Two:
          Take the t-shirt and fold the back in half so that the two seams at the neck are touching.
Step Three:
          Decide how long you want the cuts to be. Using the ruler as a guide, cut the fabric straight across, about as wide as a finger, plus a little. The first cut should be a bit thick.


 Step Four:
          Continue to cut strips about the width of your finger until you reach the bottom. 

Step Five:
          Once you have cut the back, gently pull each strip until the fabric begins to roll.

Step Six:
          Now, you can leave this just the way it is, and wear it like that for a sexy look, or you can weave or braid, as I like to call it, the strands. This girl did a really good tutorial on the 2 basic types of it.

Here's my completed shirt with the basic weave. I did the basic weave twice for this look.


Enjoy! Have fun in the sun :)

xoxo g